![[Jcount.com]](https://www.jcount.com/wp-content/uploads/2014/08/jcount150X50.png)
![[Jcount.com]](https://www.jcount.com/wp-content/uploads/2014/08/jcountstartupslogo1.png)

If you have been meaning to build a website with Wix, now is a great time. With the recent launch of Wix Code, the platform is now capable of much more fancier design styles than ever before.
Wix Code allows you to add custom interactions to your website among a host of other things. For example, you can now control how the buttons, images, shapes and other elements on your site interact with the user by simply adding one or two lines of basic JavaScript.
Here we are going to give you a concise overview on “How to create an interactive website using Wix Code?”. So pick from one of the many free landing page templates or any other template of your liking and read on to learn how to make your Wix website more dynamic:
Note: All the functionalities possible with Wix Code can’t be covered in the scope of this read. So we will be going over a simple tutorial on how to make a tooltip appear when a user hovers over an element. This should give you a clear idea on how to Wix Code works.
First, turn on Developer Tools
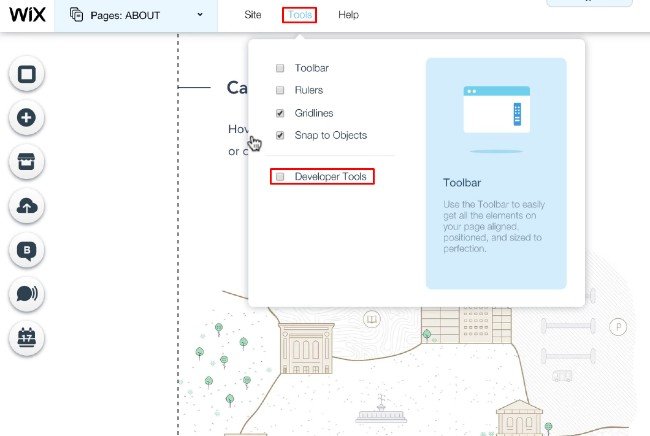
While you are in the Wix Editor, you will have to go to Tools and then click on Developer Tools from the drop down menu. This will open up a couple of new options and functions for your editor:
- To the right hand side of the screen, there is going to be the Properties Here you get access to different options and events which you can set to your different selected elements.
- To the bottom of the editor will be a Code Panel where you can type-in or paste working JavaScript code snippets.
- The Left side of the editor will get a new Site Structure
- And finally, more elements will be added to the Add Database and User Input can both be located here.
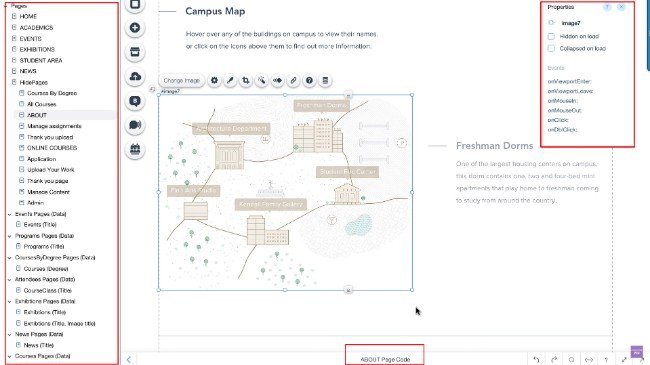
Now, it’s time to set up an Element that will respond to a user Action
To enable certain actions while the user interacts with an element on your website, you will have to assign Event Handlers to that element. An Event Handler tells your site to keep an eye on the particular element for the intended action, and if it happens, it execute the provided code. Here is how you can set up an element with an Event Handler:
- First you will have to add a box and shape element to your page. We will use the box element as the hover area and the shape element for showing the tooltip when the user hovers over the box.
- Now select the shape element. In the properties panel you will see that it has a default ID. Change it to a unique name which you will be using during the coding process.
- Do the same for the box element as well.
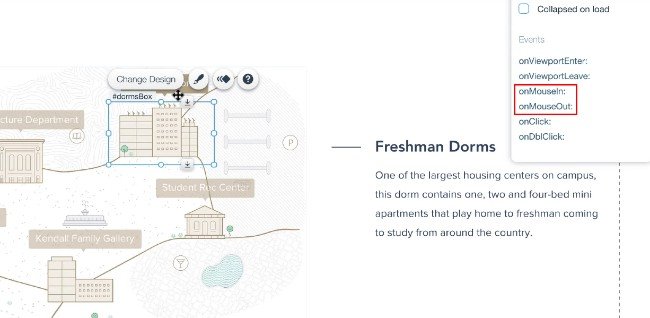
- Now on the events section of the properties panel for the box element you will need to add onMouseIn and onMouseOut You can do this by clicking the + sign.
- The mentioned step will cause the code panel to expand. The functions of your event handlers will be added here in code form.
Finally it’s time to add codes to your Event Handler
All the interactions are coded using Wix Code APIs. For example, to make tooltips appear and disappear you will need to use .show() and .hide() functions respectively when onMouseIn and onMouseOut gets triggered.
To do this, follow the given steps:
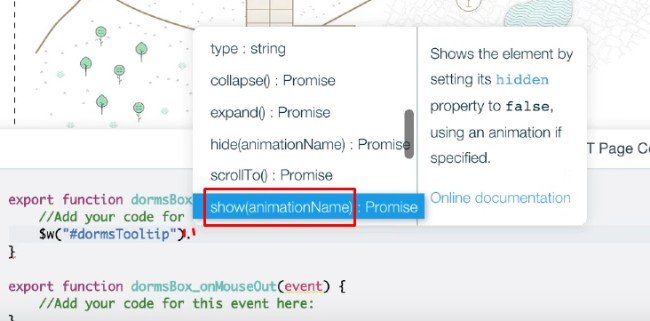
- In the code panel, locate the code snippet which has the onMouseIn Just type $w and press CTRL+space. This will bring up the code completion panel with a list of all the elements on your page.
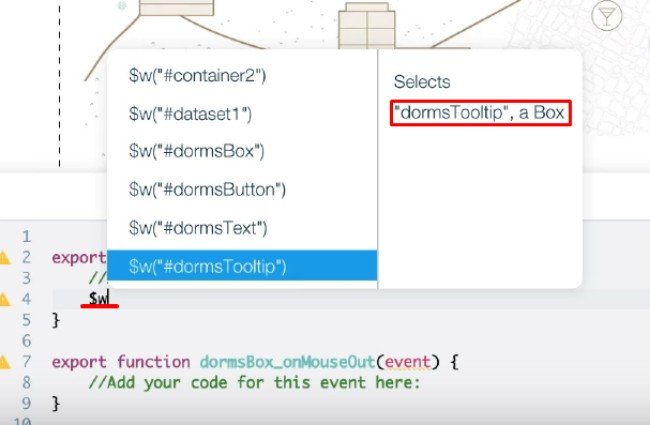
- Now just select the tooltip and press “.”. This triggers a list of functions. We are interested in the Show It will make the tooltip appear when visitors hover over the box element.
- We have to follow similar steps with the onMouseOut section as well. But instead of using the Show function, we will use the Hide function instead.
So this is basically how you will have to work around in Wix Code to make your site more engaging. This isn’t as difficult or technologically demanding as normal web development and coding making it a convenient way to make your site more interactive for non technical users.


